Hi everyone! It’s me, Cheryl, here with another card post to share. Hope you are enjoying your Summer and the bit that remains. My grands start Kindergarten this week, can’t believe it!!! Anyway, let’s get to it.
Kathleen has come out with some super cute dies this past month, and I’ll be showcasing several in this card.
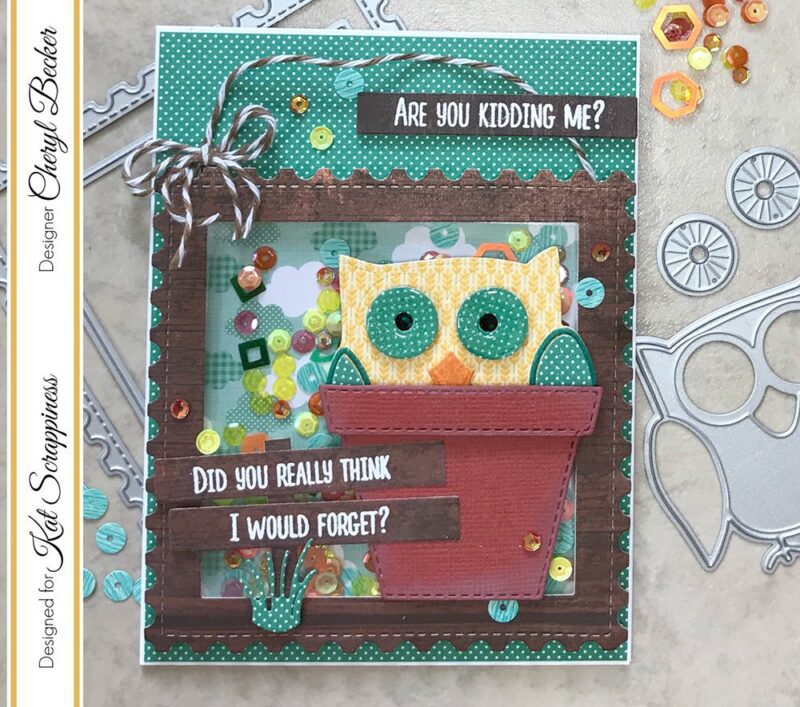
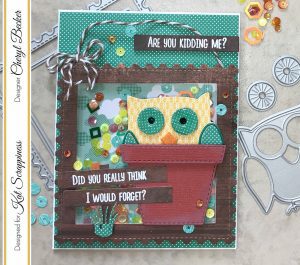
I started out by die cutting the largest of the square Postage Stamp dies from a scrap of woodgrain paper in my stash. I then used one of the Never Ending Square dies to cut a window in the center. I adhered acetate on the back side and a double layer of foam tape to create a shaker window. I added some sequins, Sunkissed Sequin Mix, Lucky Charms Sequin Mix, and Teal Woodgrain Sequins. I then cut a square of patterned paper to close off the backside. The papers I used come from Doodlebug’s Flea Market 6×6 paper pad. I die cut the elements for the Cute Layered Owl Die and assembled it. I cut the Stitched Nesting Flower Pot die from a scrap of textured cardstock by American Crafts. And I also cut the pieces from the Sign Post Die Set in the same woodgrain paper.
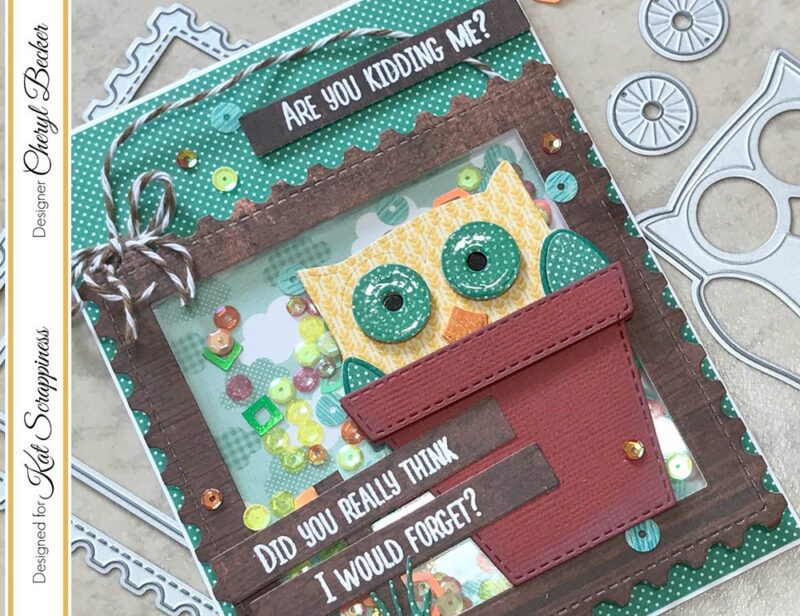
I chose my sentiments from a Gerda Steiner stamp set called Moody Unicorns. I LOVE this stamp set, it’s adorable!!! I stamped in clear sticky ink and embossed with white embossing powder. Also, for the flower pot, I cut an extra one and trimmed off just the top rim and added it with foam tape. Also inked the edges a bit.
So, for assembly I attached the owl as though he were coming out of the flower pot and trimmed off what showed. I attached it to the front of the shaker window with foam tape as well. Then I positioned the sign post and added it with foam tape. I pulled out some twine and taped it to the backside and tied a bow to make the entire piece resemble a sign. I cut a piece of patterned paper and attached it to the front of an A2 sized card base and then attached the entire shaker element to that. For the final slat from the sign post, I used foam tape and adhered it to the top right of the card. I chose a few of the sequins and scattered them around the card front and glued in place. I also added Glossy Accents to the eyes of the owl and set aside to dry completely.
And there you have it. My finished card for today. I will include the items used and link them to Kat’s store. I hope you are inspired to combine lots of different sets into one project. It’s fun to mix and match! Happy crafting!
Stitched Nesting Flower Pot die
Here’s a 10% discount code you can use when shopping.
Cheryl10
Save
Save