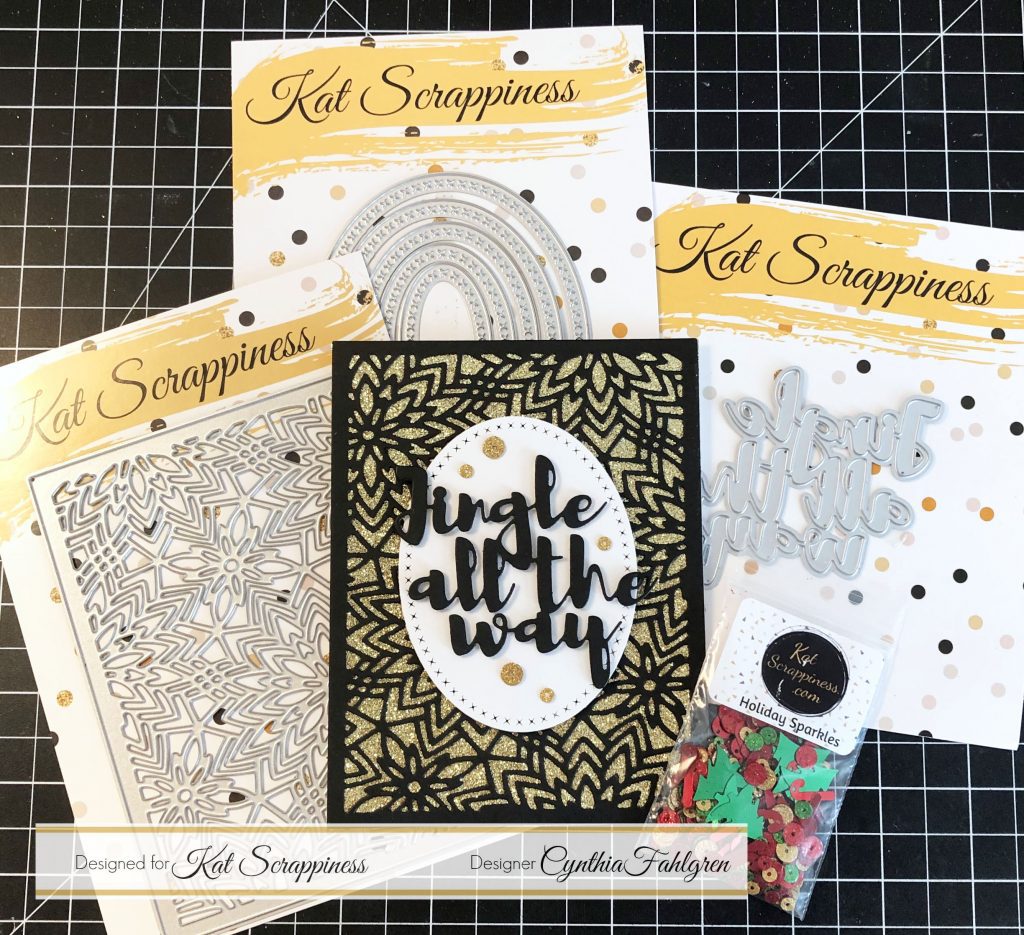
Hello again, everyone! This is Cynthia with my final Design Team project for the month of November. I used the lovely new Kat Scrappiness Fancy Floral Coverplate Die and the “Holiday Sparkles” Sequin Mix, along with the Jingle All The Way Brush Script Word Die, and one of the Cross Stitched Oval Dies to create my card. Let’s go ahead and start looking at the steps I used for this project.
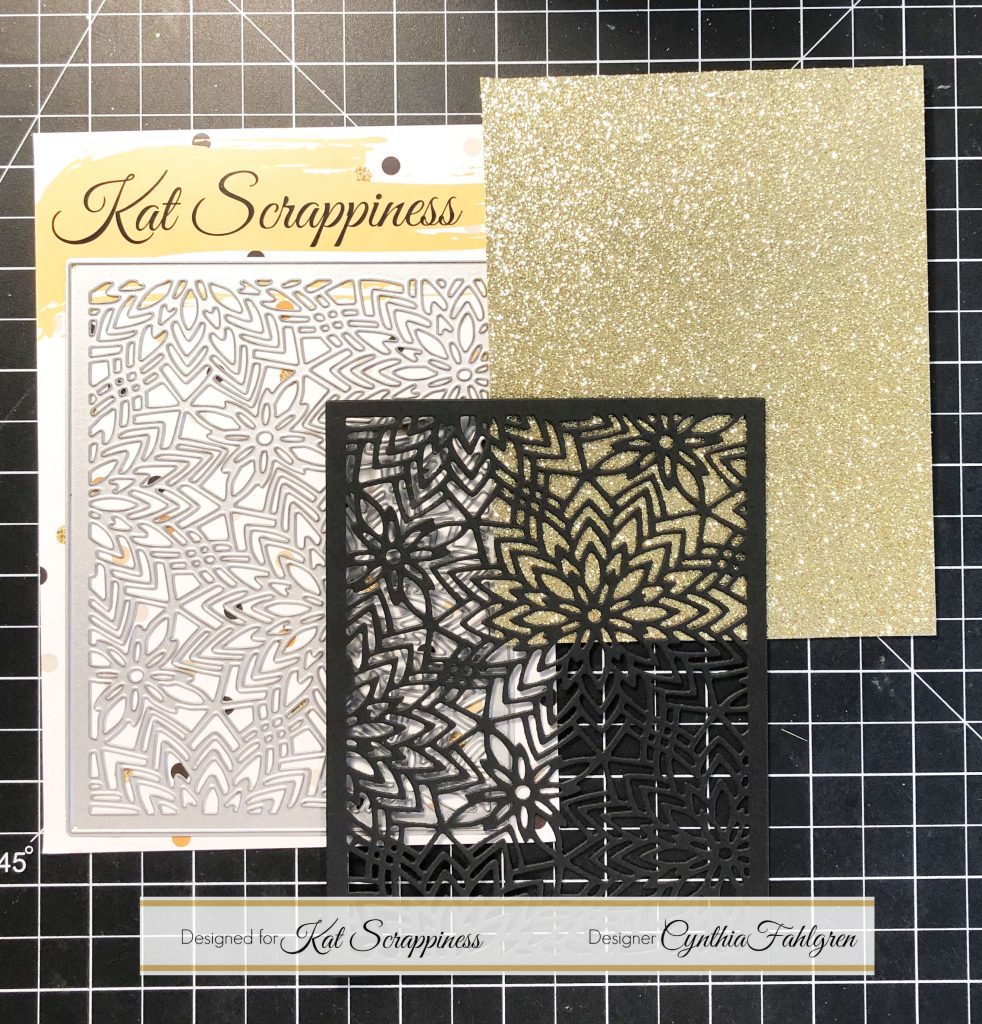
My first step was to select my card stocks. I knew I wanted to cut the Fancy Floral die in Black, with something colorful/exciting behind it. I decided to bring out some of my treasured Gold glitter card stock, which I love so much that I tend to hoard and never actually use! But if any backdrop die deserves the best, I think this one is it 🙂 I attached the Gold paper flat to my white card base, then added the Fancy Floral piece on top with some paste adhesive. This gorgeous die measures 4.25 x 5.5″ so it will perfectly fit your standard A2 sized cards.

Next, I cut out the Jingle All The Way Brush Script die in Black, and then cut one of the Cross Stitched Ovals in White. I love the elegant simplicity that black and white have, like a handsome man in a dapper tuxedo. Also, I didn’t want anything flashy that would either clash with or override the glittery gold background. I wanted to mention also that this fabulous script die cuts out all in one piece – even the dot on the letter “i.” If only you knew how much wasted time I’ve spent chasing tiny dots around my work table, you would understand the depth of my joy!
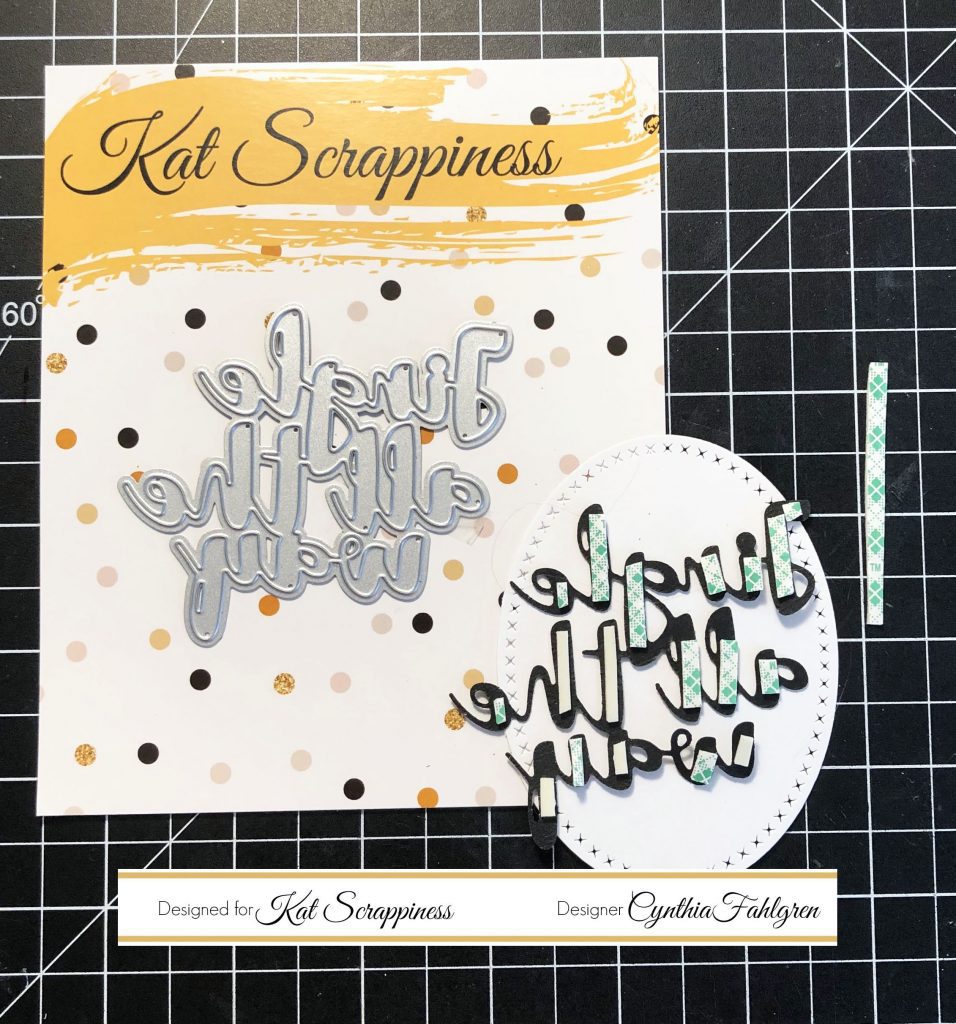
To add a touch of dimension, I cut some narrow strips of foam tape and added bits to the back of the script die. Because of the wider strokes in the lettering, there were plenty of places I could easily attach the tape. Once I’d removed the release paper bits, I pressed the words onto my oval, centering them the best I could. I like the look of some overhang, so just a few edges extend beyond the oval. You may or may not want to cut yourself a larger oval for your own card. I also added a few large foam dots to the backside of the oval to give this piece a tiny bit of lift as well. Because the foam dots and tape are quite thin, this didn’t add too much bulk.
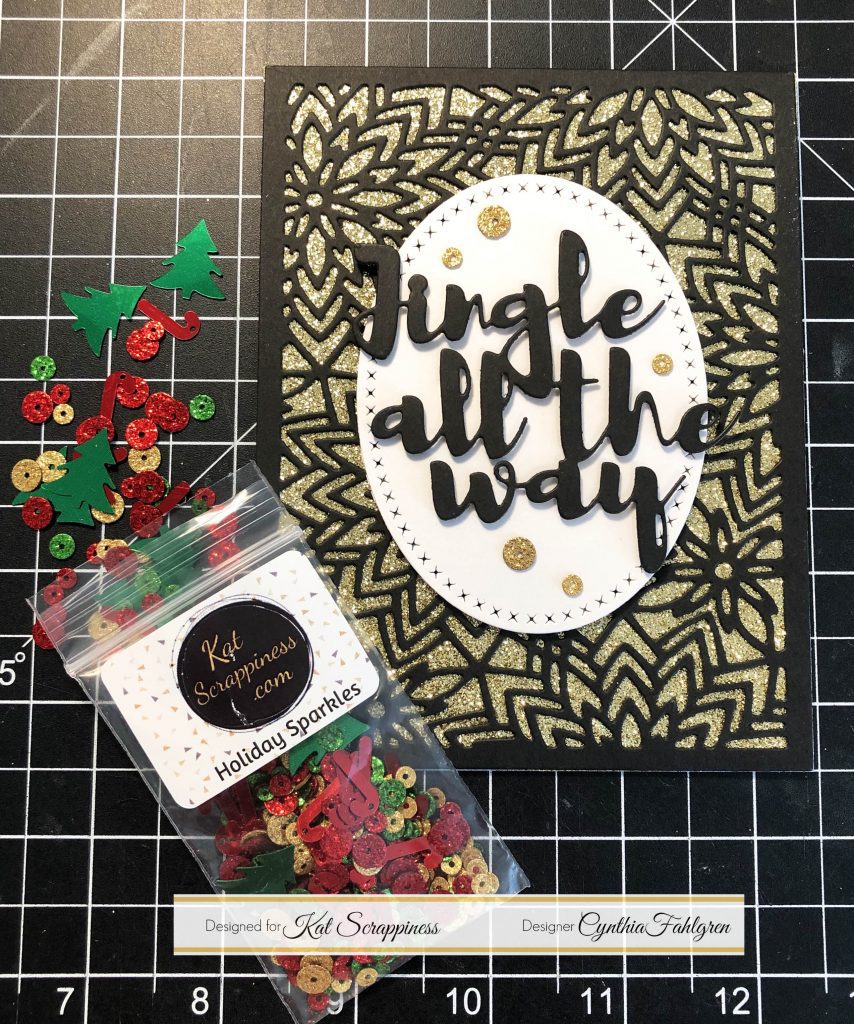
As my final finishing touch, I couldn’t resist dipping into this fabulous “Holiday Sparkles” Sequin Mix. I love the rich, traditional Christmas colors, the fun shapes, and also the glittery pieces. I decided to only use the gold glitter sequins for my card, but really any of the colors would have been lovely. They were very easy to attach with just some dots of paste adhesive, and their flatness is actually helpful for keeping them intact. If you haven’t tried any sequins mixes with the flat pieces, go ahead and grab some from Kat’s huge selection. I think you’re going to fall in love with them like I have 🙂
![]()
So that is my finished card! There are so many things I love about this one, and it’s all due to that incredible backdrop die. You can really take this one through all the seasons, and totally change the look of it just by your color choices. I hope that this card has inspired you to try out these new products, all of which are available now at Kat Scrappiness. I’ve included a shopping link below for you, and don’t forget to use my coupon code “CYNTHIA10.” When you enter this code at checkout, you will receive 10% off your entire purchase, including brand new items! Thank you again for joining me today, and I will be back again in December with more Kat Scrappiness goodness 🙂

No Comments