Hello there Crafty Friends!
I don’t know about you guys, but I totally admire all the paper crafters and artists out there that can water color. I don’t know if I’m too impatient or it just may not be my gift….but that’s okay. For today’s card I totally faked the water color look using the Stick With Me Stamp Set from Honey Bee Stamps and lots of colors of Distress Inks. This fun technique has been around for a while, but I had so much fun using it again!
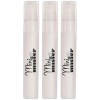
I stamped the pots first. Place the image of your choice on an acrylic block and then ink the image with your Distress Ink. Then, you hold your block away from your work surface and lightly spray with water. It takes VERY little water for this technique. After you’ve sprayed the image, stamp it onto your water color card stock. While the water and pigment are pooled up where you’ve stamped, take a paint brush and spread out the pigment and water to fill in the design. You can either let stand to dry or gently dry with a heat tool. On some of these images I went back and re-stamped the image over the top of the water color. This adds your details back in. I also smooshed the ink pads onto my glass work surface and added some detail back on top of some of the images by hand.

To create the blooms of blue color around the images I dipped my brush into clean water and added the clean water to my paper exactly where I wanted color. I smooshed Distress Ink onto my glass surface again and picked up pigment with my brush. You simple add the pigment where you have already laid down the water on your paper. The water on you paper does all the work for you. It carries the pigment to all the places you have added water. I used the same Distress Ink colors to flick ink spots onto the background.
Below I have attached a process video on exactly how I made this card. This technique has been around for a while, buts it’s always nice to reach into our bag of tricks and try something we haven’t done in a while!
Thank you all for stopping by!





No Comments