Hannah here! The crazy crafter over at Fanciful Spaces! I’ve been in a stripping streak lately. I put stripes on EVERYTHING and today is no different, I am SO excited to showcase my card for you!
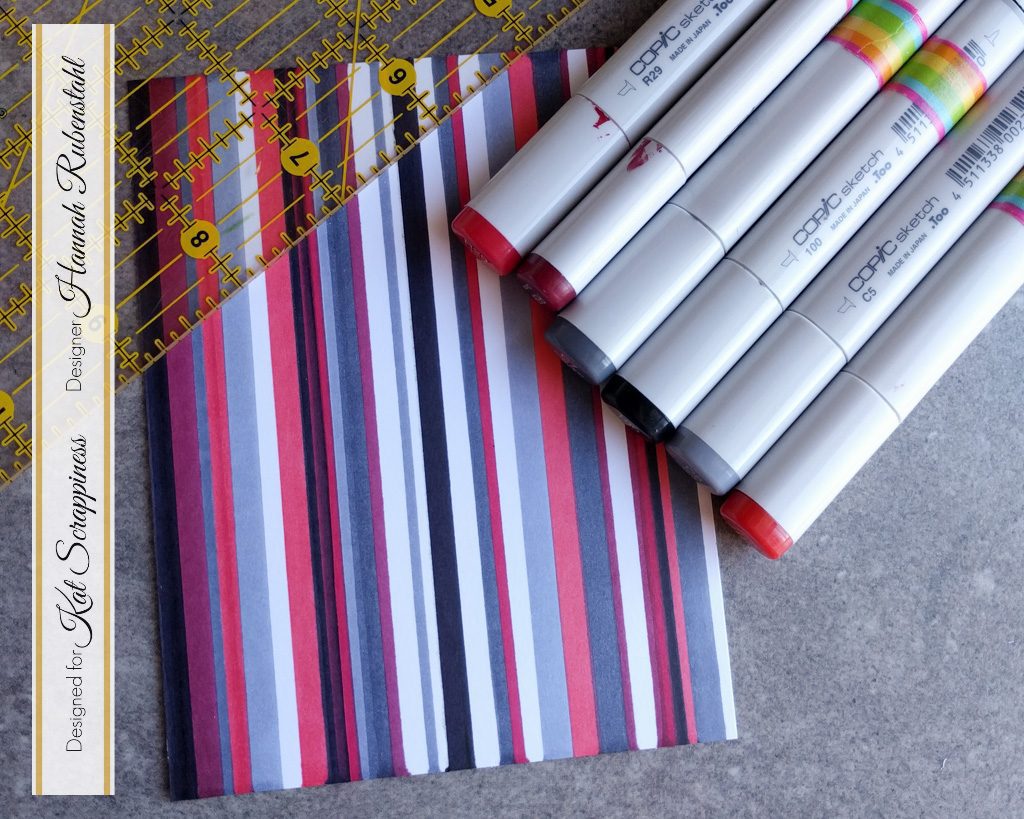
That paper, that isn’t patterned paper! I created the stripes with Copic Markers! It was so much fun! To start, I cut two pieces of Neenah Solar White in 80 lbs to an A2 size (4.25″ x 5.5″). On one of them, I created red, grey, black, and white stripes. This was a really quick and easy process, especially since I had a quilting ruler of my Grandma’s to ensure that my stripes were more or less horizontal. I played around with different stripe widths and alternated my colors as I wished. The white stripping is simply just the white paper without any Copic markering on it. When my red striped paper was done I did the same with the grey, I just omitted the red markers and added a few other grey Copics in for variety. Occasionally I did have to use some Clear Copic Marker fluid to clean off the edge of my ruler, especially when I went from a darker black/grey color to a lighter red color. If you don’t have a spare Clear Copic Marker fluid you can also use rubbing alcohol, but it really didn’t take more than a few drops to clean the edge and the project went really quick, not a lot was “wasted”.
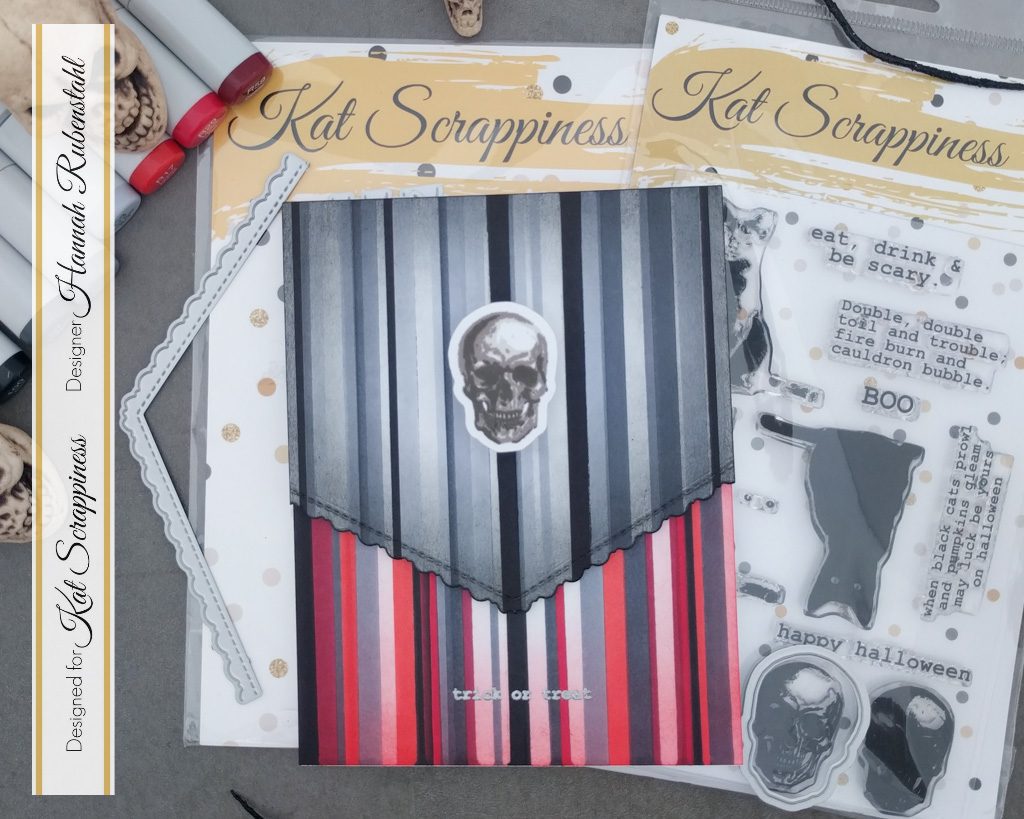
I knew two things going into this card. 1) That I was going to use the Fancy Scalloped Stitch Dies by Kat Scrappiness, and 2) That I was going to compliment those fancy scallops with the creepy skull from Kat Scrappiness’s creepy Toil & Troubled Layered Stamp set! Oh yes, this card was going to be fun!
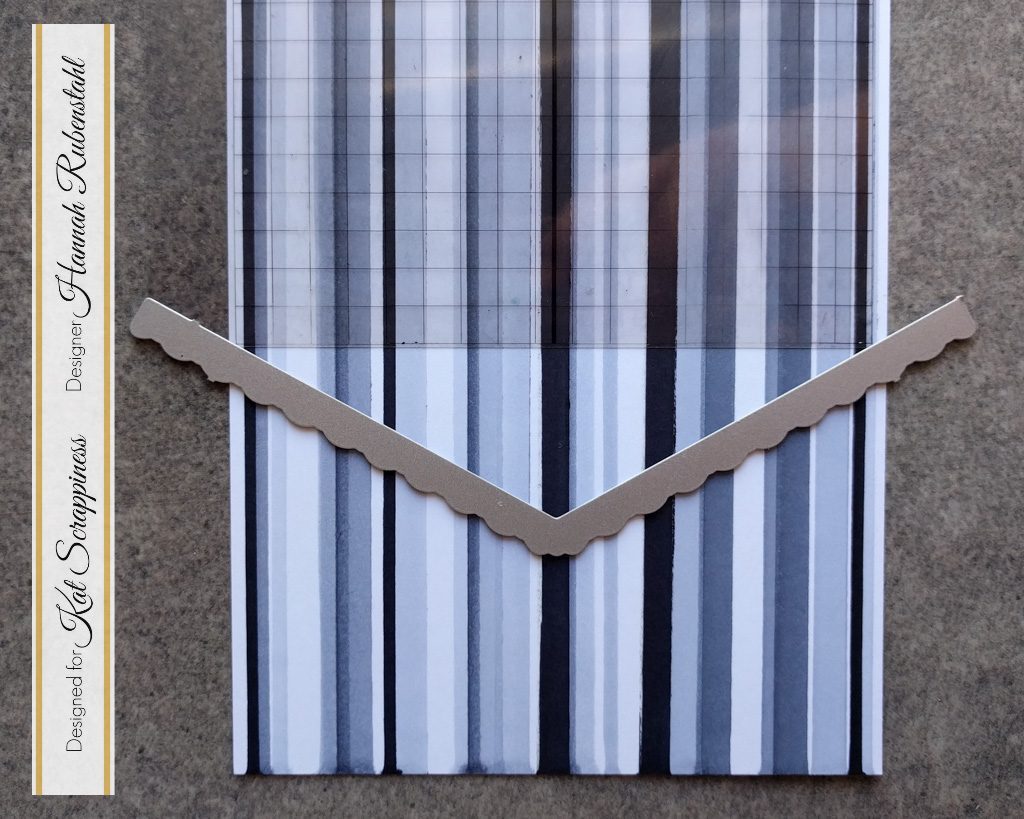
Using a sheet of acetate that had a grid on it, I lined up the angled scalloped die so that it’s point would cut at the center of my paper.
Then, using my Clarity Stencil Brushes I dusted Distress Ink along the edges of both sheets of paper to create a vignetted look. Before I adhered my two sheets of paper together I layered a piece of fun foam underneath the die cut part. I LOVE double sided Scor-Tape by Scor-Pal for adhering fun foam to paper, it is my go-to adhesive product for applications such as this!
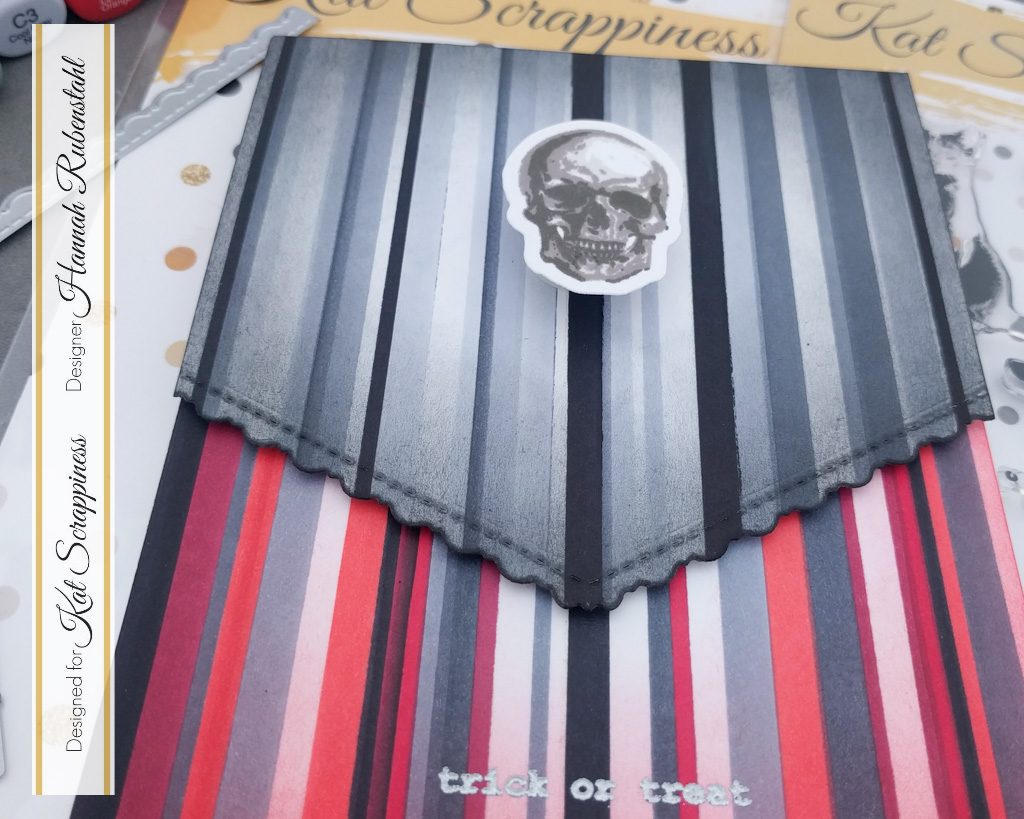
Next came the most fun part! The skull from the Toil & Trouble Layered Set! It inked up beautifully and was SO easy to line up! Who doesn’t love these layered stamps?!?!?! Using the Tim Hotlz Stamping Platform provided perfect stamping. My skull came out perfectly on the first try. I did play around with a few different greys from what I had in my stash, but it would look SUPER creepy if you tossed in some red or even blue inks!
Once the skull was inked up I realized that I wanted it to wobble. I was so happy that I had the Mini Action Wobble Springs in my stash! All that was left was to choose a sentiment and to stamp it! I chose to heat emboss the “trick or treat” sentiment from the Toil & Trouble Layered Stamp Set with my VersaMark Watermark Ink and some silver embossing powder by Lawn Fawn.
With the scalloped die cut edge, and the dainty “trick or treat” sentiment, followed with the creepy red stripped coloring and the skull, I am in LOVE with the dichotomy of this set! I hope you enjoyed this post! This card was SO MUCH fun to work on, I can’t wait to see what you do with the really cool Toil & Trouble Layered Stamp Set!
Products used in this card:
Copic Markers
Neenah Solar White Card Stock
Clear Copic Marker Fluid
Fancy Scalloped Stitched Dies
Toil & Troubled Layered Stamp Set
Clarity Stencil Brushes
Distress Ink
Fun Foam
Scor-Tape
Tim Holtz Stamping Platform
Mini Action Wobble Springs
VersaMark Watermark Ink
Silver Embossing Powder by Lawn Fawn


2 Comments
That’s such a great Halloween card ! Very original !!
October 7, 2017 at 7:27 pmLove your card!
October 7, 2017 at 8:44 pm