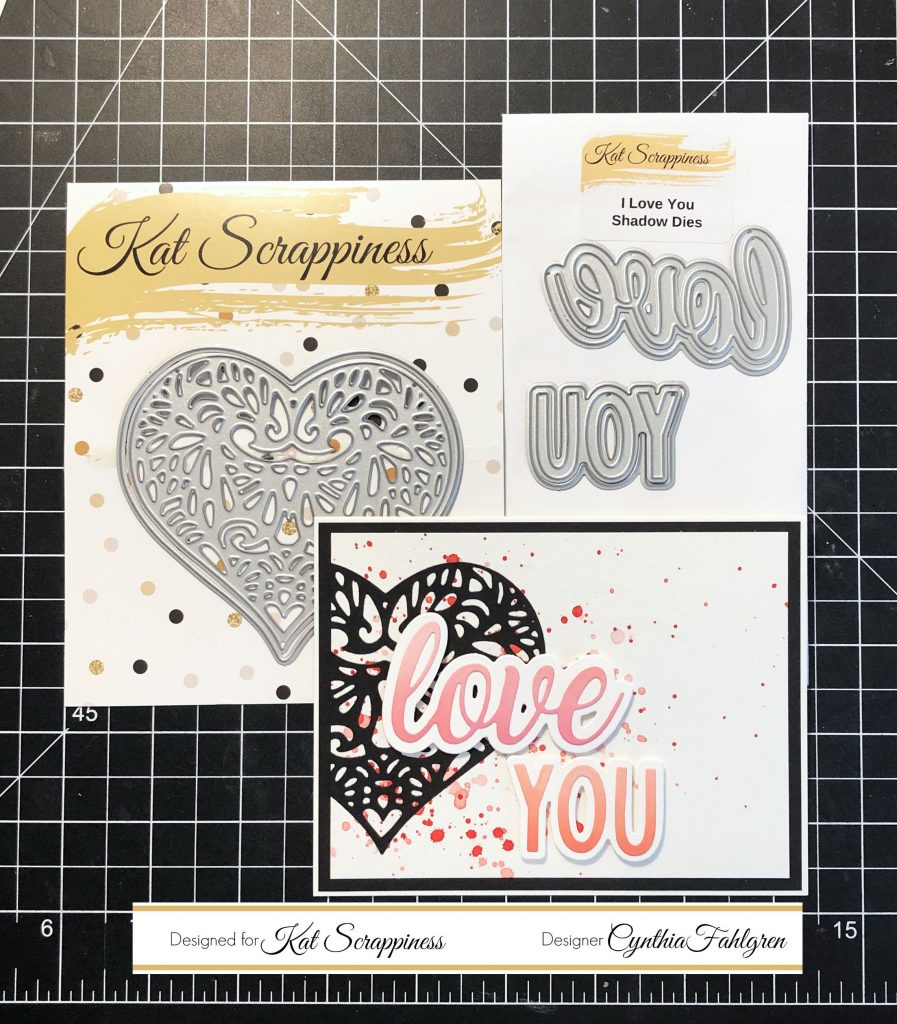
Good morning, crafters! Design Team Member Cynthia here with a final project featuring several of the latest Kat Scrappiness goodies. For this card, I have used the gorgeous Lacy Layered Heart Dies, and the I Love You Shadow Dies. Let’s go ahead and start walking through the steps I used to create my project.
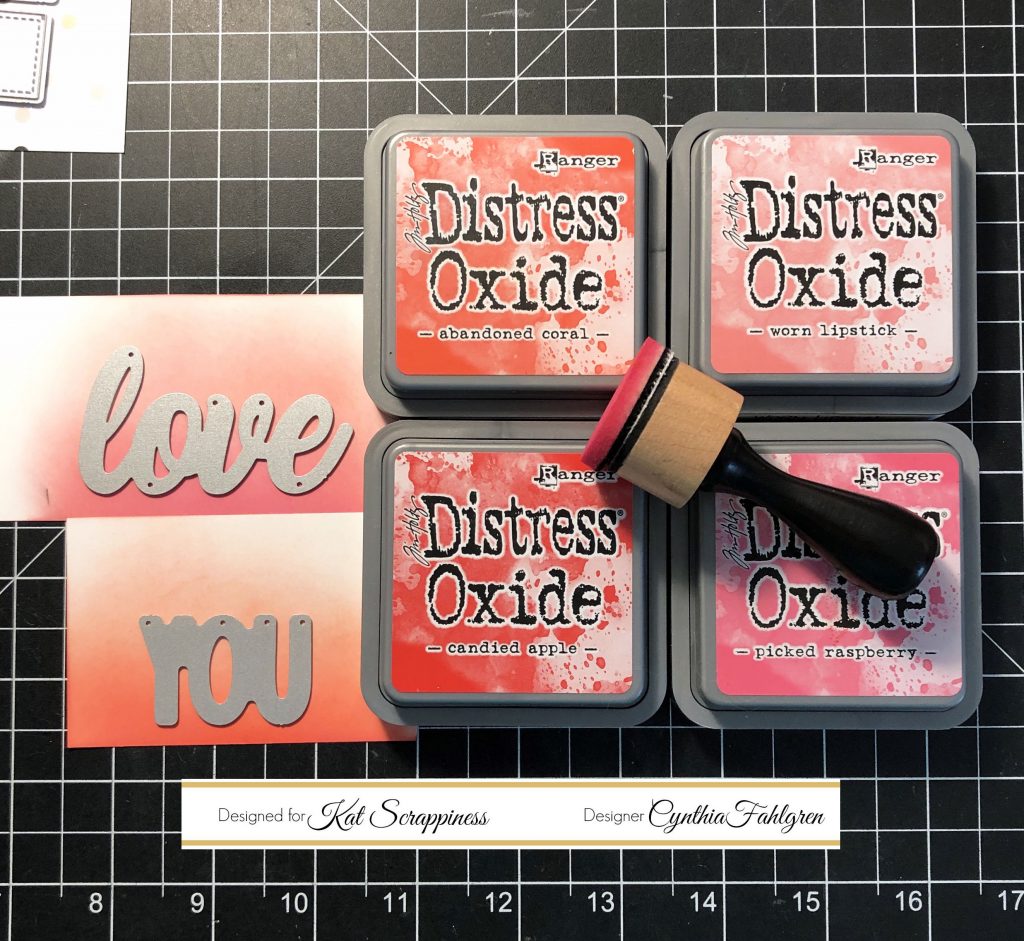
My first step was to do some ink blending with a variety of Distress Oxide inks. For the background of the “love” die I used Worn Lipstick fading into Picked Raspberry. For the “you” die I selected Abandoned Coral fading into Candied Apple. There are two tips I can give when it comes to creating a soft fade. One: Use a very smooth card stock. For this I chose Neenah’s Solar White 80-lb card stock. Two: Start at the bottom with your lightest color and blend upwards, letting the ink fade as your sponge runs out of color. Then come in with the darkest color and, starting at the bottom, blend up into the first color. Using less ink in your sponge and repeating application is better than over-saturating your paper, too.
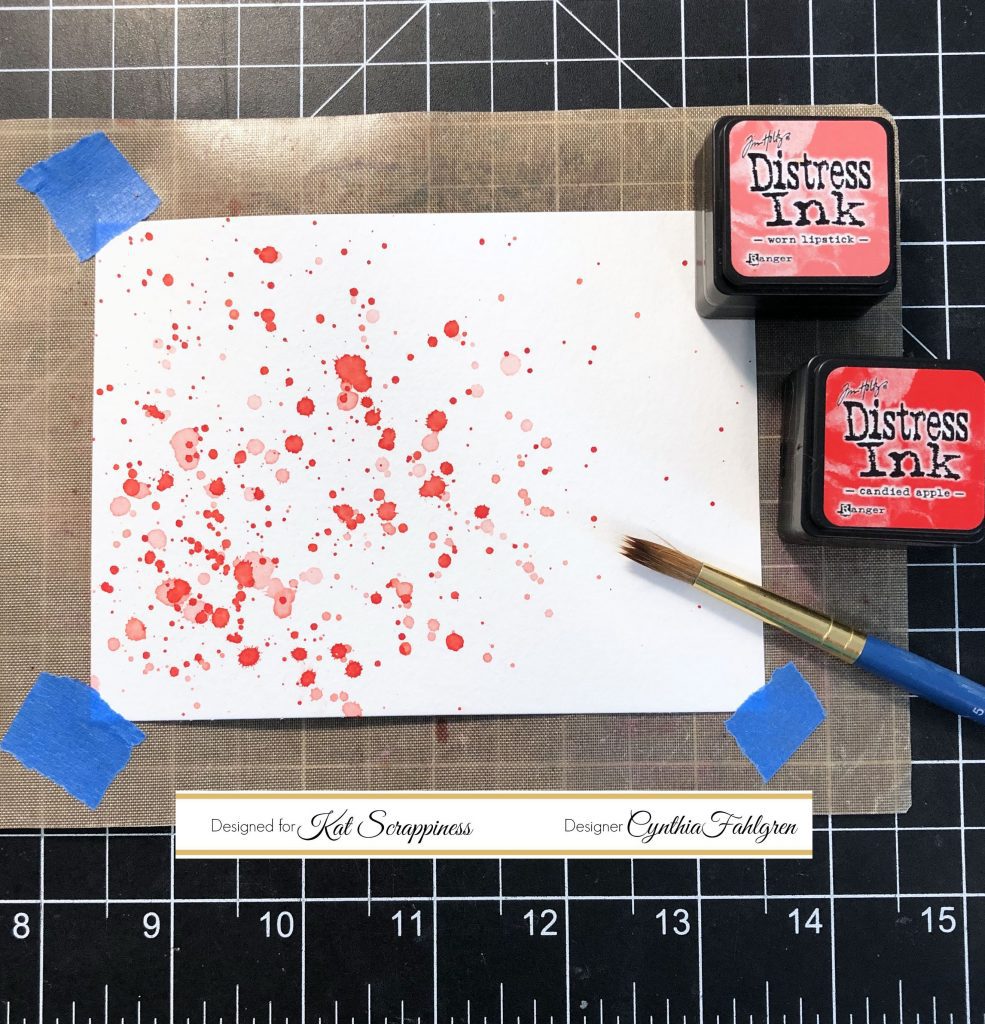
And now comes the ink splattering! If you haven’t tried this technique, I don’t know what you’re doing with your life (haha!) But honestly, this is so much fun to do. I used regular dye Distress Inks in both Worn Lipstick and Candied Apple. I smooshed the ink onto one of my acrylic blocks, spritzed it with a bit of water, then mixed it right into the bristles of a chubby paintbrush. The thirsty fibers will draw up a bunch of color, then you just tap your brush over your paper. I used a piece of Canson watercolor card stock for this because it’s best suited for handling the water and giving you great results. Another key bit of info is to let the first color fully dry before flicking on the second color. If the first layer is still wet, the inks will blend together and it will all look the same in the end. NOTE: You will want to protect your work area from the ink because it WILL splatter all over the place – trust me!
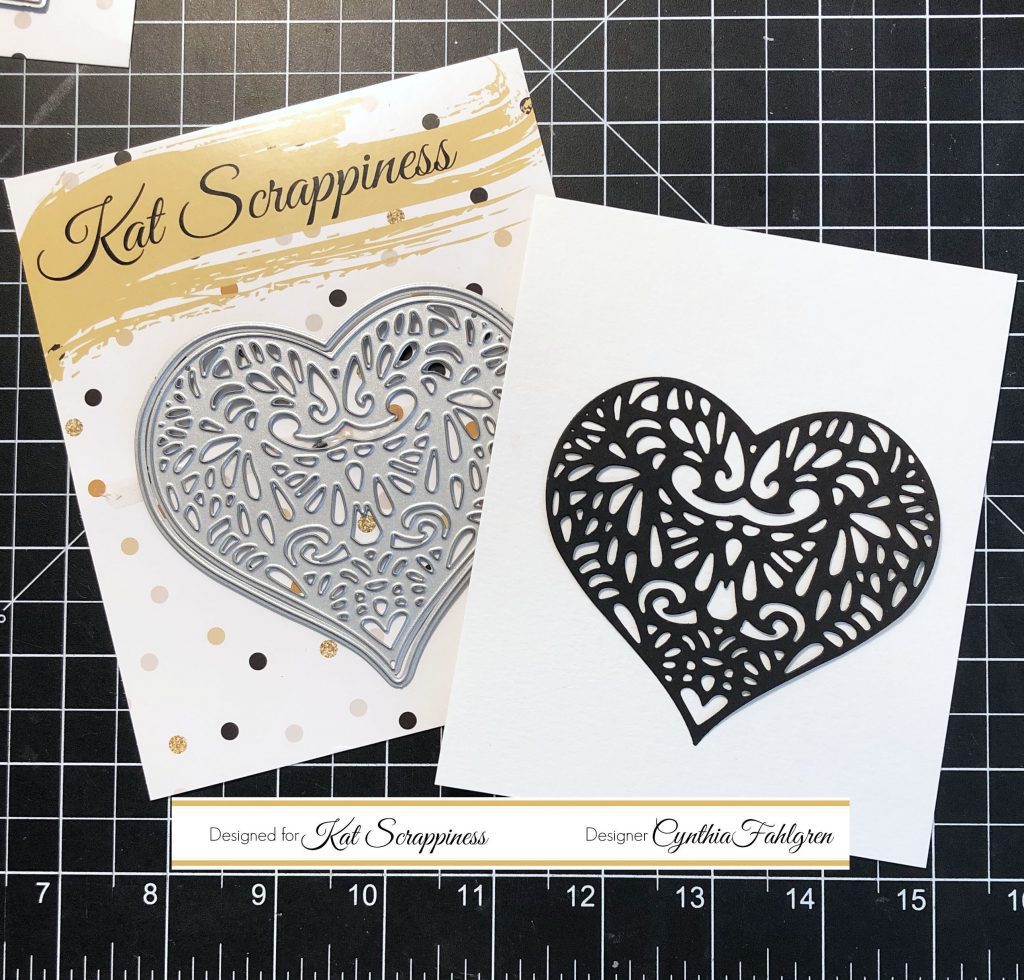
I definitely wanted to use the gorgeous Lacy Layered Heart Die on my card, so I cut it out of a piece of black card stock. I can’t get enough of this die! It cuts out perfectly every single time, and it has the perfect amount of lacy-ness. It’s delicate, but holds up beautifully. I honestly encourage you to get this die set for yourself – you’ll be reaching for it again and again 🙂
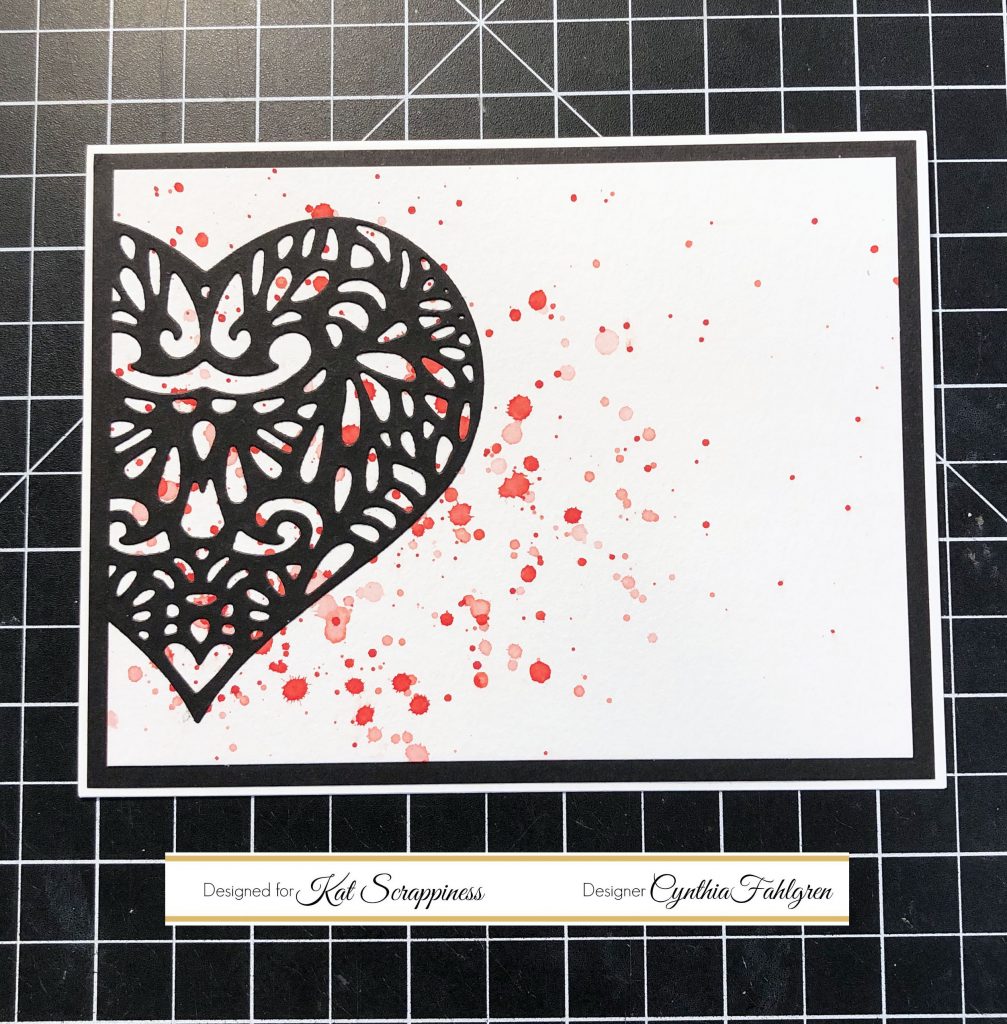
Now it’s time to assemble some layers. I used a standard A2 size card base in White, then added a layer of black card stock to act as a mat for my ink-splattered panel. I decided to trim down my heart a bit at the edge, which lets the pretty ink colors get more attention. When adhering a lacy die such as this, I like to dip my fingertip into a paste adhesive and gently rub it across the back of the die. The paste isn’t as wet as a standard liquid adhesive so there’s less squishing, and using your finger helps give you a nice thin layer.
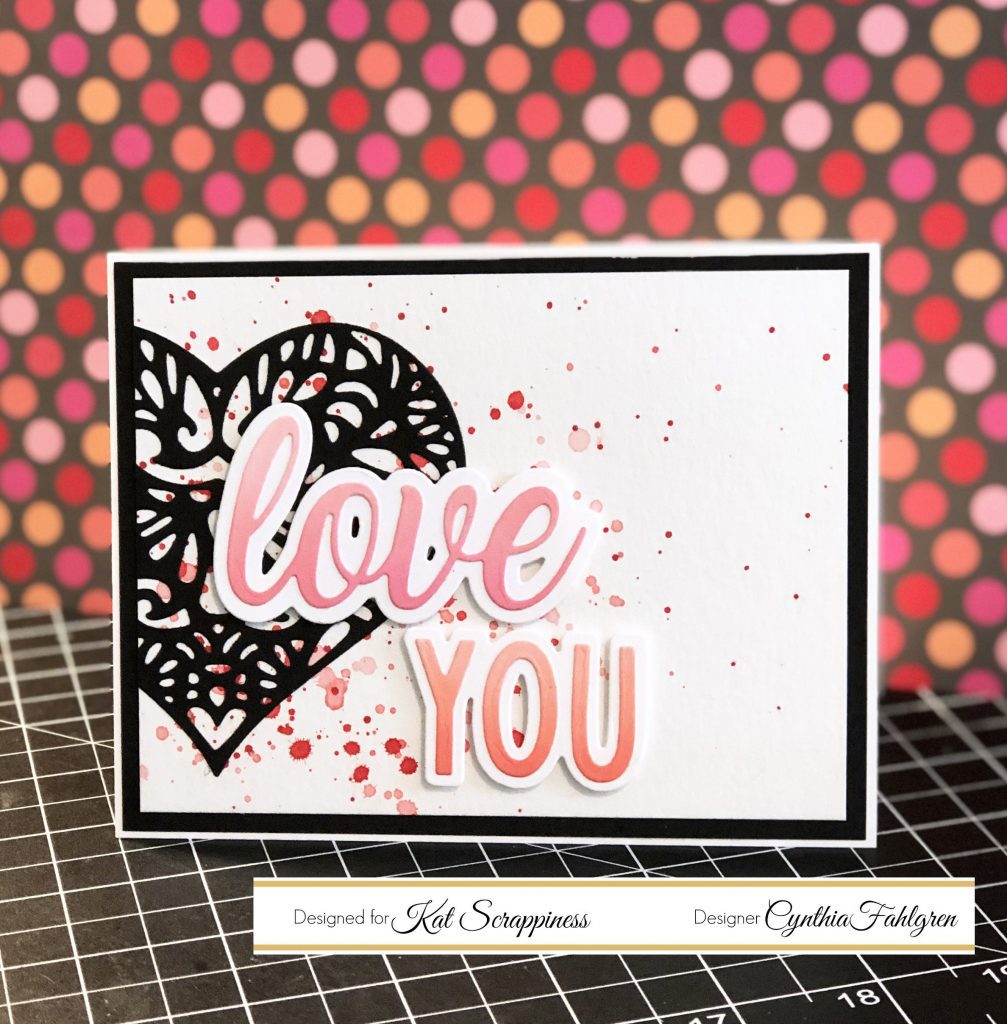
My final step was to paste my ombre-inked words down to their shadow layers, then adhere them to the card using a layer of foam tape. Since the entire card is flat, popping up the words helps them stand out very well. I hope that you had fun with this project, and that you’ll give these techniques a try. Be sure to head on over to Kat Scrappiness and grab these dies for yourself. I’ve included a shopping link below, and don’t forget about the coupon code “CYNTHIA10” that will save you 10% off your entire purchase. Have a wonderful day!


5 Comments
Just beautiful!!!
January 31, 2019 at 6:19 amTHANK YOU SO MUCH for the splatter tutuorial! I have been wondering how to do splatter colors with ink!
January 31, 2019 at 7:06 amBeautiful cards made with those dies.
January 31, 2019 at 9:00 amVery pretty card. I love the products. Thanks for the warning about the splatter.
January 31, 2019 at 12:44 pmSuper cute card! Thanks for the inspiration.
February 1, 2019 at 9:12 pm